
Building Your Own Medecoder
There have been lots of request for more information about building this tool. I will provide as much as I can here so that others can experiment with this style of tool and technique. I encourage the folks reading this page to use what I've written as merely a guideline and to try other things (materials, sizes, features, etc...). Our goal for this page is to build one of these tools that is functional and cheap. Also, we will be using materials that relatively easy to get ahold of. There will be no machining or special tools involved. Some folks out there may question the ethics of posting this information; this is a valid discussion and I encourage them (and all of you) to email me. My stance on this issue (disclosure, etc..) in this case is that the amount of practice and skill involved in using the completed tool mitigates any public safety concerns created by this page. Also, I would greatly appreciate it if the information used on this page were not used for commercial purposes.
Materials and Tools
- Tools
- Dremel
- Cutoff Wheels for Dremel (several may be needed)
- Epoxy or JB Weld
- Locking Vise Grips or Needle-nose Pliers
- Printer + Computer
- Paper (for printing)
- Scotch tape or similar
- Small Round Hand File (for deburring)
- Power Drill
- Ruler
- Materials
- X-Acto #1 Hobby Knife (P/N: x3201) (for groovergrabber handle)
- K&S 6" long, 11/32" O.D. Brass Tube (for groovegrabber jacket)
- K&S 6" long, 3/8" O.D. Brass Tube (for scale tube)
- K&S 6" long, "13/32" O.D. Brass Tube (for extra support/trim tubes)
- K&S 36" long, 0.020" diameter Music Wire (for groovegrabbing wire)
Groovegrabber
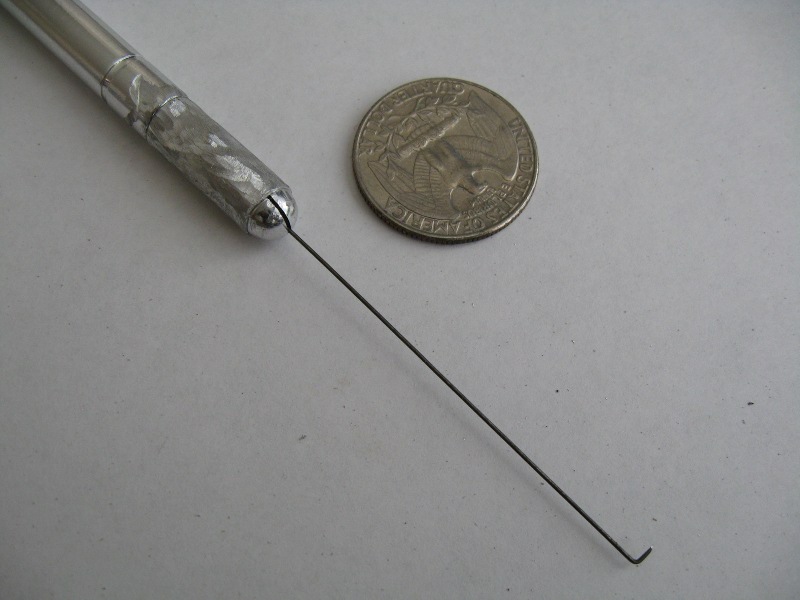
This is the part of the tool which you hold and use to hook into the sidebar grooves. It consists of an X-Acto knife handle with a piece of bent 0.020" diameter music wire clamped in it. One also may be able to use a pin vise for this purpose, but because we are going to be epoxying the wire into the handle, X-Acto handles are good for this use (cheap and disposable).
- Wire Tip
- 2) Cut a roughly 3" piece of 0.020" music wire using either the Dremel or pliers.
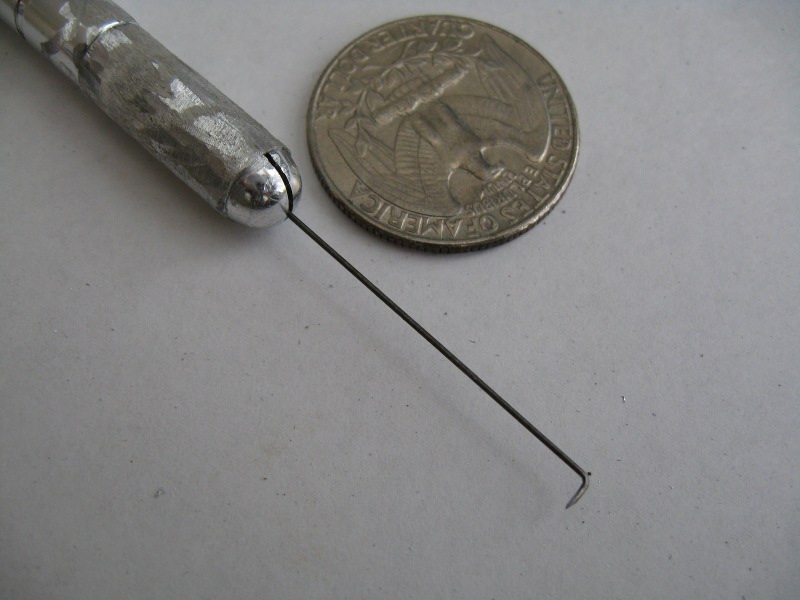
- 3) Make a tight bend in the end of the wire using the pliers. Grind or cut this bent section until it is about 1/8" long.
- 4) Grind this bent tip so that it is rounded off or sharpened. This will allow the wire to more easily slip into the grooves.
- Handle
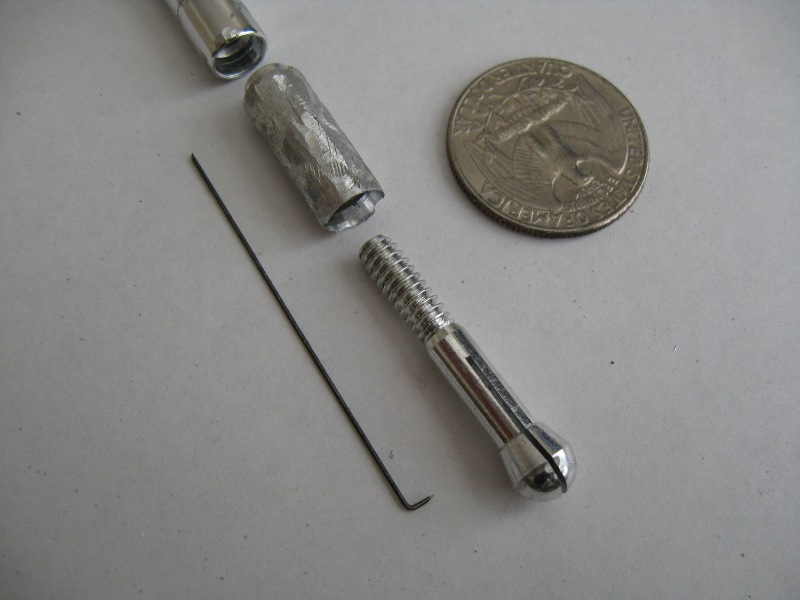
- 1) Remove the blade from the X-Acto knife; we will not be using it.
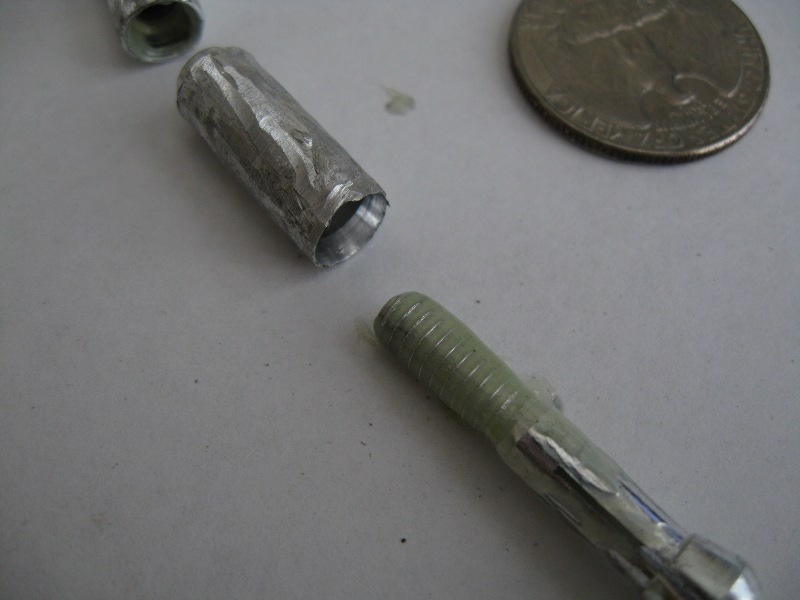
- 2) Use the Dremel to grind the knurling off the hobby knife handle. Do this until you can comfortably slide it inside the 11/32" brass tube.
- 3) Loosen the collar of the X-Acto knife, insert the wire piece fully, and tighten the collar.
- 4) Measure the distance from the bend to the very tip of the X-Acto handle until it is 1.25". Remove it, cut it, and measure it until it meets this length.
- 5) Once the distance (1.25") is found, remove the wire and fully loosen the collar. Remove all of the parts of it and set them aside.
- 6) Mix up some epoxy and coat the various parts of the collar as well as the inside of handle.
- 7) Put the collar back together, insert the wire, remeasure the distance, and tighten the collar. I like to use locking vise grips to get it extra tight.
- 8) Allow the epoxy to cure.
- Handle Sleeve
- 1) Cut the 11/32" tube so that it covers the full-thickness part of the handle and deburr the cuts.
- 2) Measure 13/16" from one end of the tube (we'll call this the "front") and make a mark.
- 3) Insert the tube into the chuck of the power drill and carefully tighten it. Be sure the mark is visible.
- 4) Spin up the drill and press the edge of a Dremel cutoff wheel or something similar into the metal at the mark. Our goal here is make an engraved ring at the mark. I like to trace inside it with a fine-tip Sharpie as well.
- 5) Remove the tube from the drill chuck and test fit the hobby knife handle into it. We do this to make sure the drill chuck didn't crush the tube.
- 4) Use the Dremel or some grit paper to rough up the surface of the X-Acto handle.
- 5) Apply some epoxy all over the handle and slide it into the 11/32" tube.
- 6) Allow the epoxy to cure.
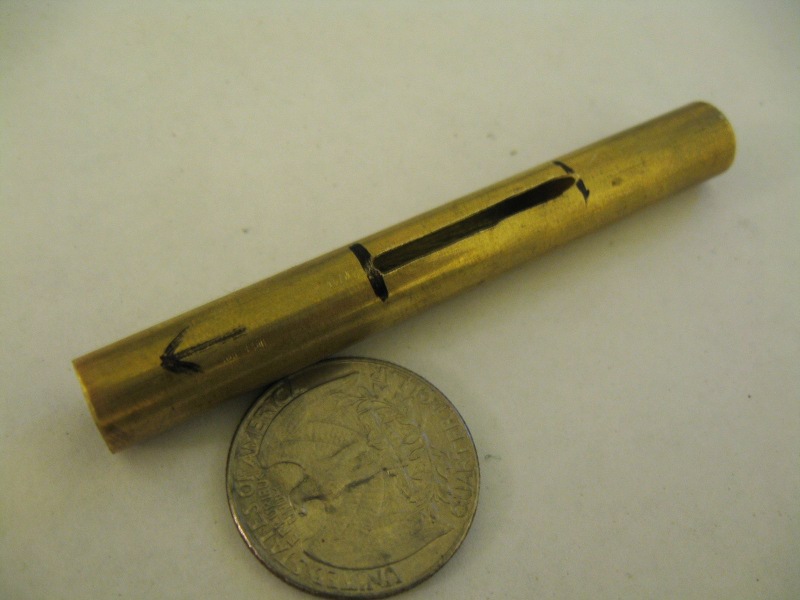
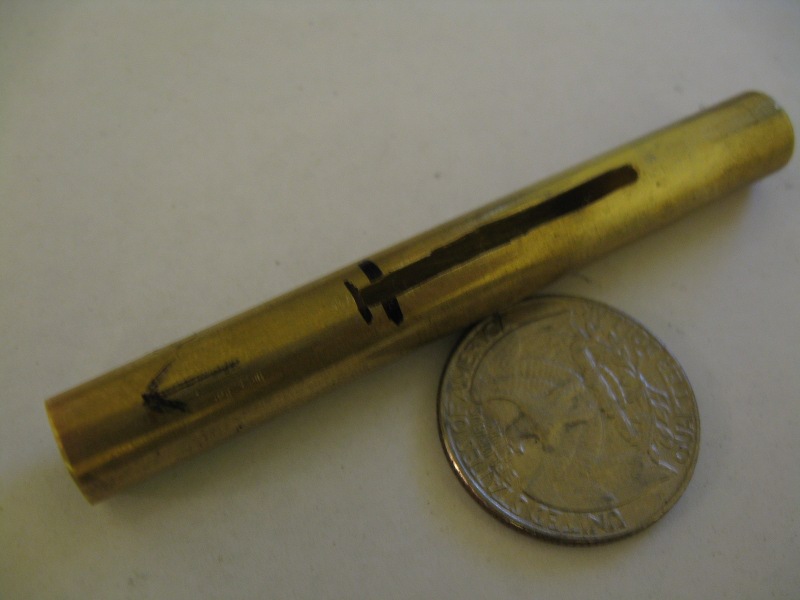
Scale Tube
The scale tube is used during picking and decoding to determine how far the groovegrabber is inserted into the lock. The groovegrabber slides inside the scale tube. When the user wants to measure the depth, they slide the scale tube against the plug face and compare a scale in this tube to the index mark on the groovegrabber.
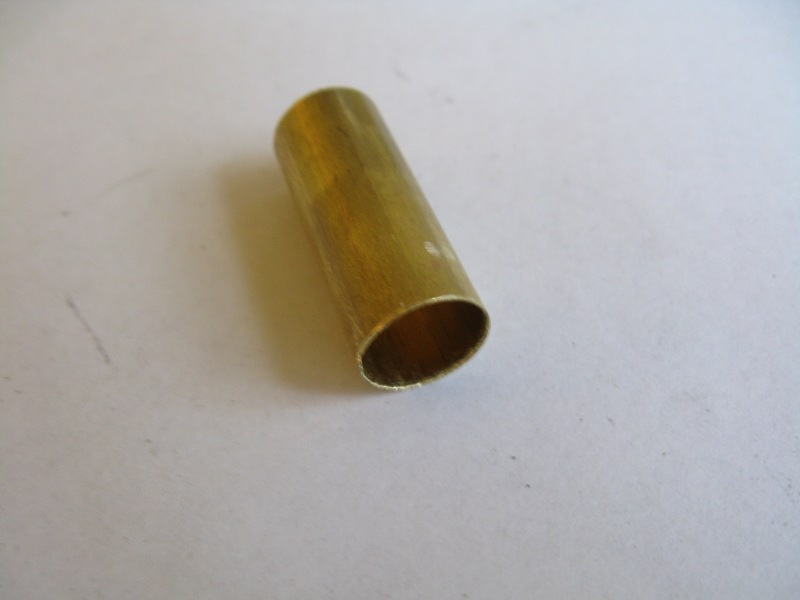
- Main Tube
- 2) Cut a roughly 3" piece of 3/8" brass tube using the Dremel and deburr the cuts.
- 3) Make a mark that is 1 1/8" from the "front" of this tube. When the index mark is lined up with this mark, the distance from the front of the scale tube to the wire tip should also be roughly 1 1/8".
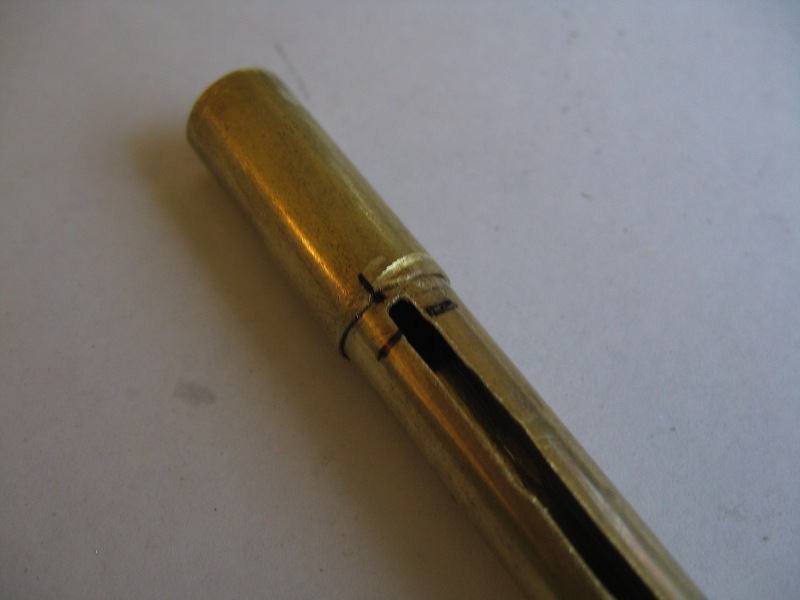
- 4) Use the Dremel to Cut a 1" slot toward the back of the tube from this mark. This is the slot that you will view the index mark on the groovegrabber through.
- 5) Extend the viewing slot forward of the mark by about 1/8".
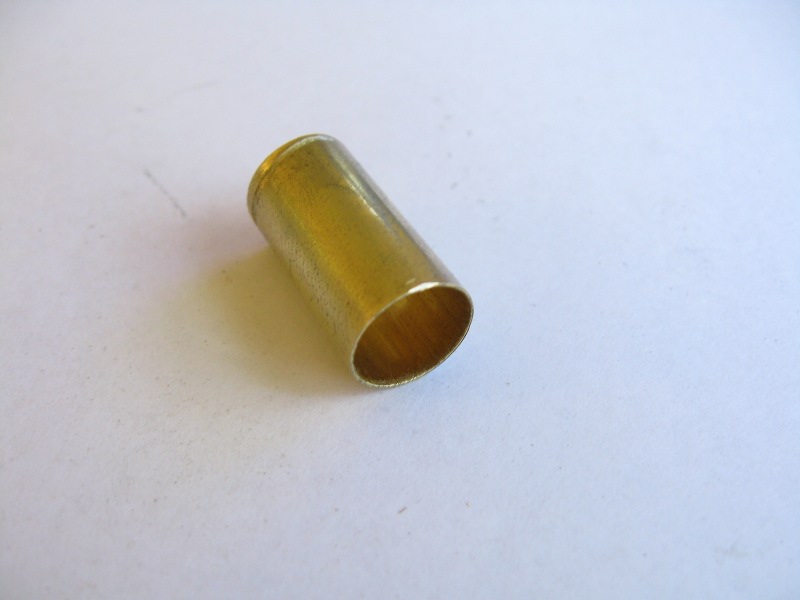
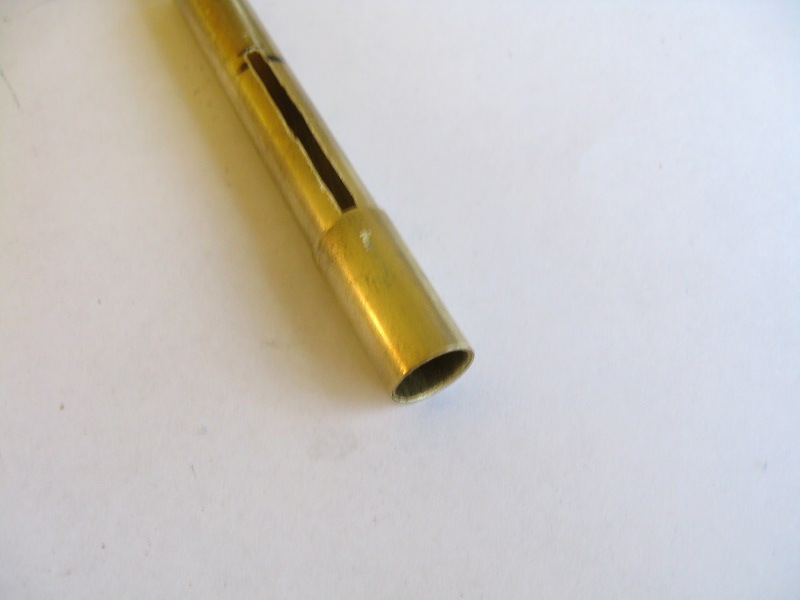
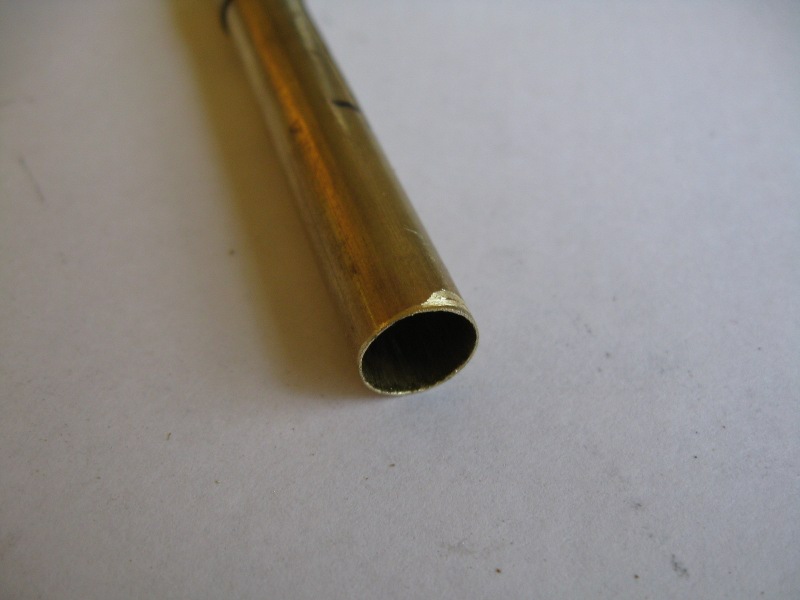
- Support Tubes and Calibration
- 1) Cut a roughly 7/8" piece of 13/32" brass tube using the Dremel and deburr the cuts.
- 2) Use epoxy on the back 5/8" of the scale tube and slide this tube over it. This piece will provide some additional strength the back end.
- 3) Trim about 1/8" off the front of the main scale tube and deburr the cut.
- 4) Cut a 1" piece of 13/32" brass tube using the Dremel and deburr the cuts.
- 5) Apply some epoxy to the forward-most 1" of the scale tube but stay away from the side with the slot.
- 6) Slide the 1" support tube over the scale tube while being careful to get as little epoxy inside the tube as possible. The polishing material "Nevr Dull" is very helpful to have on hand as it can remove stray epoxy easily before it cures.
- 7) Do not allow the epoxy to cure!
- 8) Insert the groove grabber and use it to hook into the sidebar groove of the pin all the way in the back of the lock.
- 9) Check the measurement to ensure that the index mark lines up with the scale tube mark and adjust the position of the front support tube until it does. If all went well, this adjustment should be very minor. I also recommend finding this information without the epoxy applied as a guide, but don't trust the marks too much.
- 10) Once you are satisfied that everything is adjusted properly allow the epoxy to cure completely.
- 11) Cut a nice notch in the front of the completed scale tube on the same side as the viewing slot and deburr it. This will allow flat tensioners to be used the top of the keyway while the scale tube is butted against the plug face.
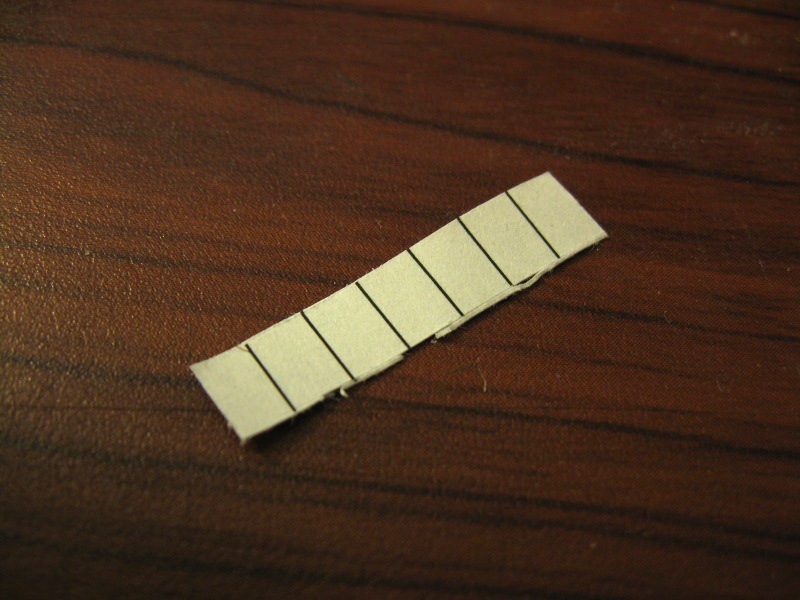
- Paper Scale
- 1) Print a scale spaced at 0.17" and cut it out so that it will fit between the support tubes.
- 2) Wrap it around the scale tube so that it does not cover the slot but the printed marks are very close to it.
- 3) Use Scotch tape to attach it in this position.
Drawings and Measurements
For further reference, here are some measurements. Click the thumbnails to get the full-size images:
Tballard was nice enough to whip up a few scales on a PDF. These should print at the appropriate size on any computer and printer.
Successful Builds
Tballard:
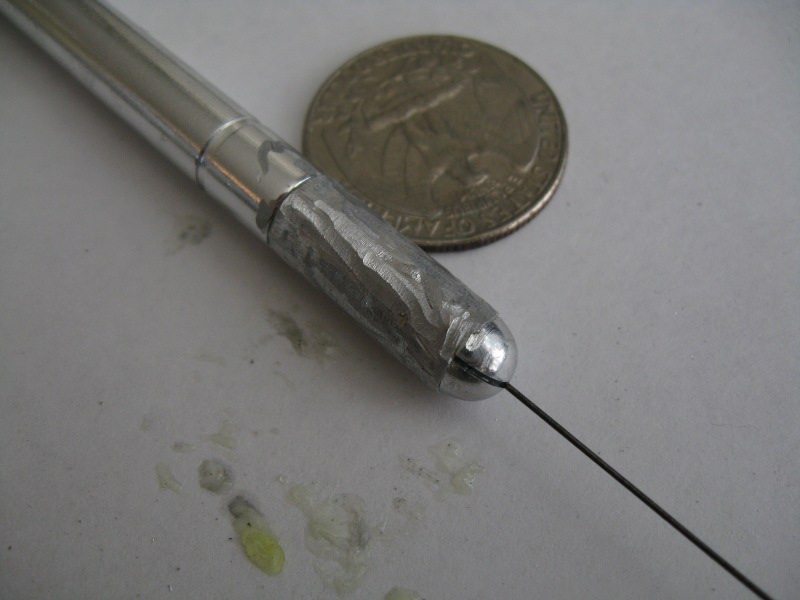
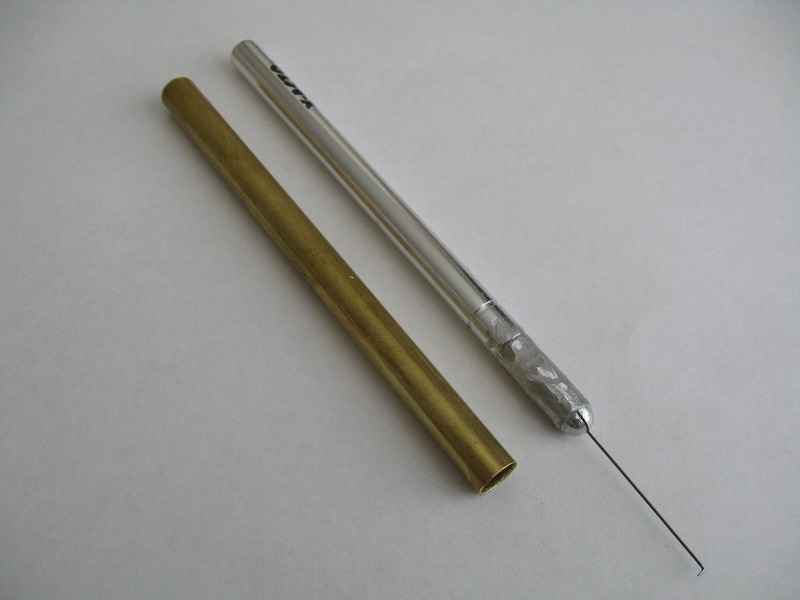
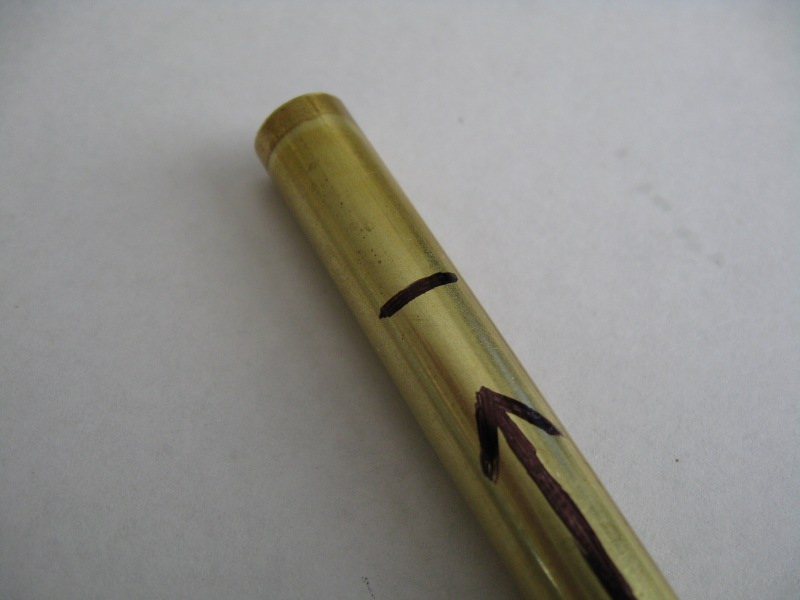
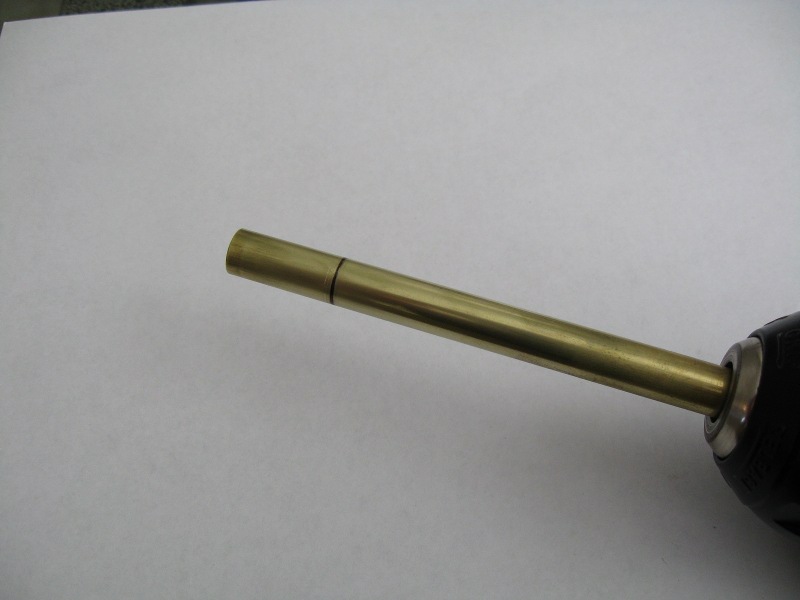
The Medecoder I built relied heavily on JK's plans, and throws in a few minor tweaks. The most noticeable is the engraved flat stainless steel scales. These are made from strips sourced from windshield wiper inserts, and the cuts were made by taping the inserts to a paper scale, and scoring them with a needle file. The scale tube itself is double thickness, and the window was filed down enough to provide a shelf to fit the scales into, with the overhanging portion filleted with JB Kwik epoxy. (For those sharp-eyed readers who wonder why there are seven ticks, the answer is that I can't count... opps) The groovegrabber is also slightly different in that hobby-knife blade handle is only epoxied into the back section of the handle, and the collar for the collet is epoxied into the the front of the scale tube. As a result, the rear section can be twisted to loosen and tighten the collet, allowing the probe wire to be adjusted or replaced after construction. (The collet which comes with X-Acto pn: x3201 is slotted, but I was able to find a generic hobby knive with an "X"-shaped collet, which makes centering and clamping the wire much easier.) The other thing I did differently was the initial calibration. Even though my wire is adjustable, I prefer to not mess with it, so the technique I used should work for fixed-wire designs as well. What I did was build the entire tool first, and then mark the groove grabber with a normal ball-point pen when I calibrated it. This mark is temporary, but good enough to test out all the various positions before commiting to something more final. Once I was happy with the ink mark, I used a micro-tubing cutter to score a circle around the tube, and then used a variation of the "drill and cutoff disk" method JK recommends. It was a lot of fun to build this tool, and I'm sure it is the first of many to come.
sfi72:
My Medecoder build went well, I tried not to deviate from the original plans too much just in an effort not to screw things up too badly. My main problems were during the cutting of the slot on the measuring tube, its rather hard to cut a straight slot with a Dremel but after 2 tries I got it close enough. The calibration was also a bit of a pain, I chose not to use the paper scale and to draw my own, but as I found out it is very hard to draw 6 lines that are exactly the same distance from each other. However, even though my lines weren't exact the tool still works perfectly because of the sidebar leg tolerances. A small improvement that I think people could implement would be using a tubing cutter to make the engraved ring on the 'groove-grabber', because the drill and Dremel approach is rather awkward, though effective. I also used a wire wheel to buff the entire tool, before calibration to give it a smoother glide and make it shiny. Overall, I had a lot of fun making it and the tool is very effective.
Yono:
With my deepest gratitude to the inventor of this device JK. for so many years, i planned to pick this Medeco cyl.one thing that stop me is the side bar. until i saw JK video demo.thinking of mat.same w/ JK proj.i have none.but considering my thoughts , that just as long that i will be within its principle i can use any material that fit and modify. here is the product of my interest. and for a long yrs.this is the first time i ever pick a medeco cyl. and i succeeded with the Medecoder Aid.see pics for those interested to make one.it isnt hard as it look. & my help is available,all the way. The perfect material:1medeco dbl.prof.cyl.,1solid aluminum plug follower ,3semi fine thread screws,1spring.